
Who among people here wants a slow internet connection? No doubt, no one!
Did you know that the Fastest Internet in the World lies mostly in Asia?
According to Bloomberg: Top 10 Fastest Internet in the World, on their lists as of January 23, 2013, the TOP 1 country with the fastest internet speed is the HONGKONG(average peak of 54.1 Megabits per Second), next to it is SOUTH KOREA, then no.3 JAPAN.
Now, how about the Philippines? Sadly, it did not even place at the top 10. Honestly, its sucks because of the slow and very expensive internet connection, though.
See another post also: World’s Fastest Internet @ 120GB/s
Now, this blog post purposely shares a simple yet great tip and trick to increase and improve for 20-40% (most likely estimated) connection speed, oh yes, without even using premium software. Of course, I tried and experimented it and it works like a charm!
See another post – Improves signal: Boost Signal: Speed Internet ConnectionHOW TO: Increase 20-40% Internet Speed Without Using Any Software?
To boost internet speed, you need to follow these simple steps.
See also post here: The Use of SpeedConnect: Boost UP Internet
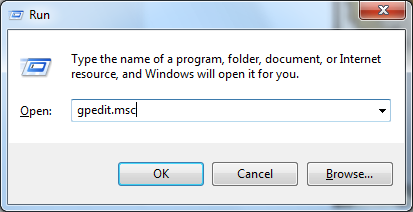
STEP 01
Open Run Window
use Windows logo + R and type cmd or click start and type:* run
*Vista/Windows 7
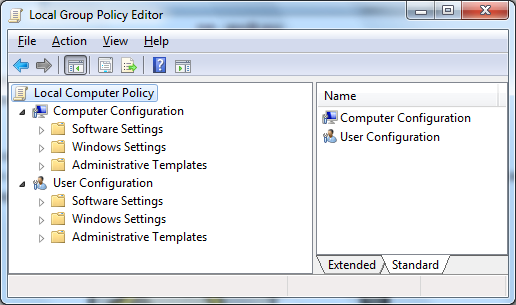
STEP 02
Type gpedit.msc in the textbox, and it will display Local Group Policy EditorNote: gpedit.msc short for group policy edit? 😉
The Local Group Policy Editor is a Microsoft Management Console (MMC) snap-in that provides a single user interface through which all the settings of Local Group Policy objects can be managed.
STEP 03You might try this: Boost Internet with these FASTEST DNS Servers
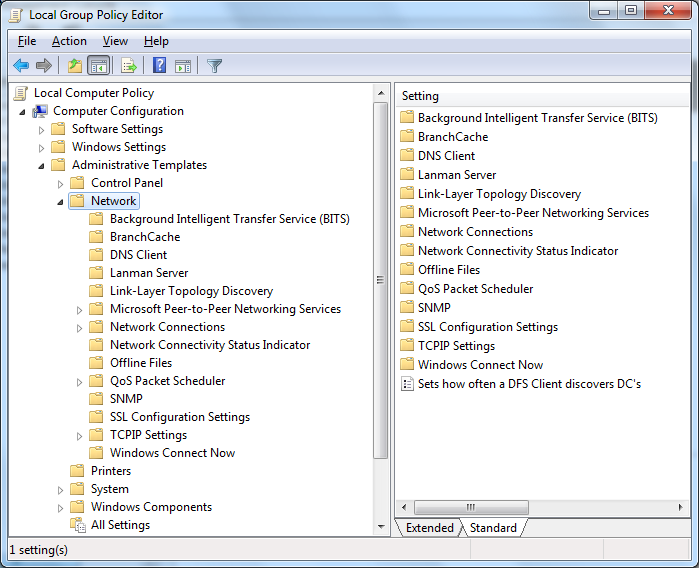
Now in Computer Configuration tree, click Administrative Templates folder. Then it will show you some items in the right pane.Administrative Templates are registry-based policy settings that appear in the Local Group Policy Editor under the Administrative Templates node of both the Computer and User Configuration nodes. This hierarchy is created when the Local Group Policy Editor reads XML-based Administrative Template files (.admx). STEP 04
Click Network tree folder
STEP 05Under Network, click QoS Packet Scheduler
STEP 06In the QoS Packet Scheduler, in the right pane, click Limit Reservable Bandwidth
| Computer Config -> Administrative Templates -> Network -> QoS Packet Scheduler -> Limit reservable bandwidth |
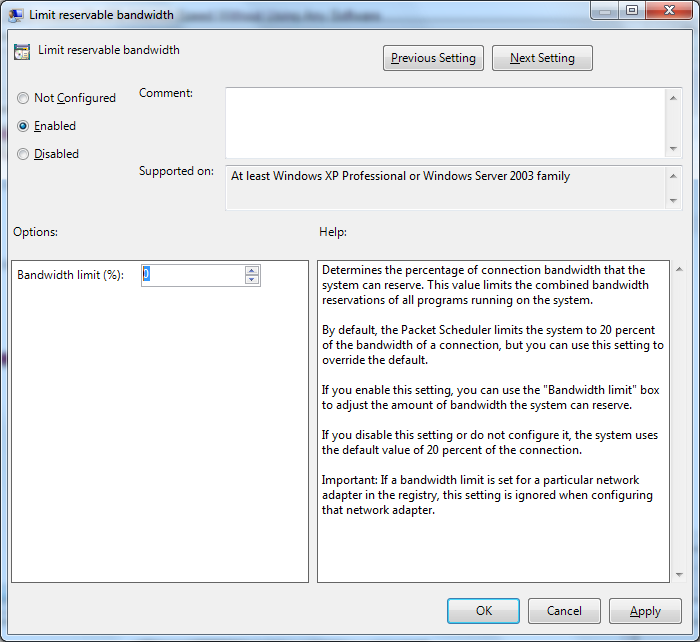
STEP 07
In the Limit reservable bandwidth window, by default, it is set to NOT CONFIGURED. Now, change it to ENABLED and set Bandwidth limit (%) to 0. See image below.
Notes:Determines the percentage of connection bandwidth that the system can reserve. This value limits the combined bandwidth reservations of all programs running on the system. By default, the Packet Scheduler limits the system to 20 percent of the bandwidth of a connection, but you can use this setting to override the default. If you enable this setting, you can use the “Bandwidth limit” box to adjust the amount of bandwidth the system can reserve. If you disable this setting or do not configure it, the system uses the default value of 20 percent of the connection. Important: If a bandwidth limit is set for a particular network adapter in the registry, this setting is ignored when configuring that network adapter.STEP 08Click ok or apply! Then enjoy! ^_^ Say WOW!

Does it Improve your internet connection speed? Is the information useful to you? If yes, Please do share/like/tweet this great tip… THANK You! ^_^